Revision Timetable (Week View)
Ayoa’s Revision Timetable Template allows you to plan your week in a way that works for you. It is vital that your revision strategy is structured and focused, so you can make sure every step you take is a step forward. There are lots of different ways to create a revision timetable in Ayoa, but we’ve kept things simple here so you can focus on what actually matters.
Looking to boost your grades? Get our FREE revision guide
What is the Revision Timetable Template?
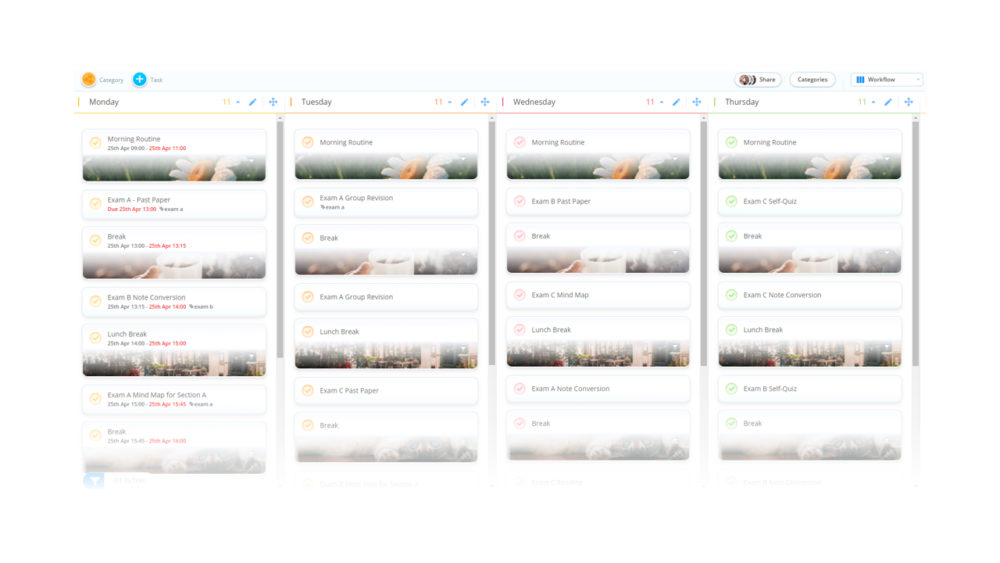
This template is for students at any level who are looking to add structure and routine to their revision planning. This template breaks up your revision into manageable chunks of no more than 45 minutes, with time for breaks and other activities. You can easily change the dates, tasks, and how long you’re revising for through Ayoa’s task detail tab.
Why should you use Revision Timetable Template?
Revising is about studying the right thing at the right time. To do this, you need a solid revision timetable by your side, and this template does just that.
The digital nature of the template means that it’s easier to change and alter, without having to write it out over and over again. This means you don’t have to duplicate your work and waste time you could be spending actually revising.
This is a template that other students have used to smash their exams, and so is already in working order. But the great thing about this timetable is that you can change it however you want, and make it work in the way you want it to. With Ayoa, the possibilities are endless.
How to use the Revision Timetable Template?
Ayoa’s templates are super easy to use and only require a few steps to get started:
To access the template, sign up to Ayoa. Once you've signed up, navigate to the homepage before selecting New project. Choose the Use a template option, and select this template from the library.
Once the template is opened, start inputting your relevant subjects. You can easily move tasks between different days, and add other breaks or activities wherever you want by double clicking on the space.
For each of your tasks, add a start time and end time in the task details section. Here, you can also make your tasks automatically repeat every week. This means that when you have completed a task, it automatically recreates itself at the bottom of the day, dated to the following week!
Add images, change the view, and make your timetable look exactly how you want it to. Don’t be afraid to create a digital space that makes you happy – this should be fun, and not a chore.
For each of your 45 minute sessions, you can add relevant documents or links via the comment section, which can help you switch straight into focus mode when it comes time to begin. Additionally, you can add the details of your task to the notes section, so you know specifically what you need to be doing.
If you need any further assistance, you can always refer to our support page, or look at our guide on task details.