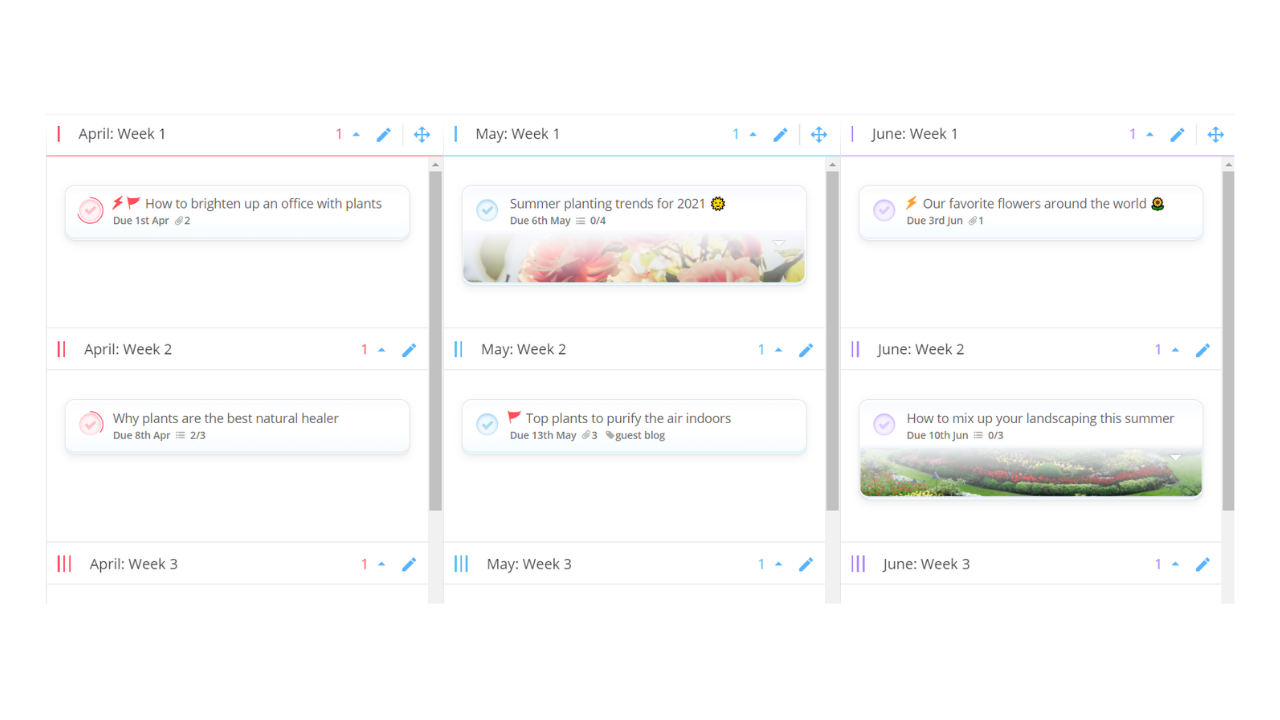
Content Calendar template

Ayoa’s Content Calendar template will help you to create a clear schedule of the content you’re planning to produce for your company or agency clients, so you can ensure that everyone is on the same page in terms of what will be done, and that work will be delivered on time.
What is a content calendar?
If you’re an experienced social media manager or copywriter for a marketing agency or internal marketing team, then you don’t need us to tell you why it’s vital to have a content calendar for your business or the various clients you work with – and it’s likely that you’re already using one in some form! However, for those that are new to content management, a content calendar (also known as an editorial calendar or social media calendar) is a written schedule of when you plan to publish upcoming content, whether this is on a blog or various social media channels.
Using a content calendar can help you determine if there are any gaps between the content you plan to post, so you can ensure that each channel you manage is kept up-to-date and updated frequently, so you can retain the interest of your readers and followers. By setting clear dates for each post or piece of content, you can also ensure that your deadlines are always met.
The Content Calendar template in Ayoa makes it quick and easy to make a clear schedule of the blogs, articles, or social posts you will be creating and when they will be posted thanks to the highly visual nature of the template. It can also be easily shared with your clients, manager, or anyone else that needs to approve it before work begins.
Why should you use our Content Calendar template?
There are many reasons why you should use a content calendar, from keeping your managers and clients updated on what you will be working on for them, to ensuring that your deadlines are manageable and able to be reached. Because Ayoa’s Content Calendar has sections for every week of each month and enables you to set dedicated start dates, due dates and reminders for each and every piece of content you add to the calendar, it will always be clear what is planned to be delivered and when.
Ayoa’s Content Calendar template is in the format of a task board, meaning you can easily add your content as tasks and add as much detail as you need to keep yourself on track – such as notes, comments, checklists, priority and importance indicators, tags, and file attachments. This means that everything you need to produce this content can be kept in one place – whether this is a checklist of points you want to cover, links to resources you want to reference in your work, or a brief from your client detailing what to include.
If you use a dedicated app to schedule social media posts (such as Hootsuite or Sprout Social), you can use our template to send to your client for sign-off and feedback in the form of notes and comments. Then when everything has been approved, you can easily copy this content into the app to schedule as everything you need will be there.
Additionally, when you create a task and add it to the Content Calendar template, you can also use the visual progress indicators to track what percentage has been completed. So, if you share your content calendar with your clients or manager, they only need to view it to get an instant status update at any time.
How to use our Content Calendar template
Ready to create a content schedule that will wow your manager or clients? Our template has everything you need to get started quickly – all you need to do is start creating tasks! Discover how to use it by following the steps below.
To access the template, sign up to Ayoa. Once you've signed up, navigate to the homepage to create a new whiteboard, mind map or task board and choose this template from the library.
When you open the template, you will see that it has already been divided into each week for the different months of the year, so you can easily see at a glance when content is due to be published and quickly identify any gaps. In the first column of the template, there is also a ‘Content ideas’ section for you to add your ideas before deciding when they will be posted.
Start by using this section of the template to brainstorm ideas for social media posts, blogs or articles, adding them as tasks to be put into a schedule later. To add your ideas as tasks, click on the ‘task’ button in the left-hand corner of the app and drag it into the category you want it to appear in. Then in the pop-up that appears, write your blog title or a brief summary of your post. Don’t forget to choose ‘Content ideas’ as the category for it to be added to!
Tip: If you’d prefer to brainstorm ideas in an Ayoa mind map or whiteboard, you can turn your mind map branches and the sticky notes on your whiteboard into tasks that can be added to your content calendar.
Use the task details to add helpful information to each task you’ve created (such as links to sources, points to include, and any briefs you’ve been given) in the form of attached documents, images, comments, notes, and checklists. You can even add useful tags that can be seen without needing to click on the task it’s attached to.
To access the task details, simply click on a task to open the side panel. You can then navigate through the various tabs to add the information you need.
Tip: Need to add another week to a month? To add a new category within another category of the template, click on the ‘Category’ button, then drag it into the section you want it to appear in. Remember, any categories you add within another category will be automatically organized in numerical or alphabetical order.
When you have your ideas down, drag them into the sections that correspond with when they will be published. Yep, that’s right – moving tasks around your task board is as simple as clicking on the task, then dragging and dropping it into another category!
Now it’s time to go into more detail. Add start dates, due dates and reminders to each task, as well as importance and priority indicators to help you prioritize your workload.
If needed, you can now easily share your calendar with others by inviting them to the board and choosing whether they have ‘view only’ access or permission to make edits. If they don’t have an Ayoa account, they will be able to quickly and easily create one for free!
Ready to start creating your content? Keep referring back to your calendar to ensure you stay on schedule. Use the progress indicator for each task (which can be found in the task details) to indicate what percentage of it has been completed at various points. When a piece of content or post is live, drag the progress bar all the way to 100!
Tip: Once you mark a task as completed, it will move from your task board after a short period of time and be able to be seen in the ‘Completed’ view. To access it, click on the ‘Workflow’ button in the right-hand corner of the app (‘workflow’ is the view that your task board is already set to). You can then select ‘Completed’ from the list of options.
