January 10, 2017
Planning your new projects
*PLEASE NOTE – DropTask is now Ayoa – an all-in-one tool for idea generation and collaboration, that goes beyond traditional task management. Discover Ayoa and achieve your best work.*
7 Steps to getting started with DropTask
A new year often brings exciting new initiatives. But when it comes to planning your upcoming projects, it can be hard to know exactly where to begin. Whether you’re launching a new website, devising a training course or hosting an event, you’ll no doubt need a clear project plan to help you stay on track to reach your goals. A good project plan will outline your key steps, deliverables and the team members involved in the project, keeping everything organized in one place.
Today, we want to show you how DropTask can become your go-to tool for managing just about any type of project – big or small, work or home. A beautifully fluid interface hides an incredibly powerful feature set for project management, and mobile app availability makes it easy for you to stay on top of your tasks while on the go.
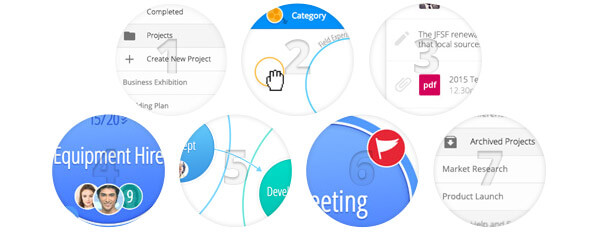
Let’s start with the basics – creating your first project. Follow these 7 simple steps to design a foolproof project plan and move forward with confidence.
Step 1: Start a Project

Create a fresh Project by clicking the ‘+ Create Project’ tab under the Menu. Give it a title. Your project can be literally anything! Teachers can create projects for each class or module they teach, product developers can create projects for each new launch they work on, bloggers can create projects to manage their publishing calendar and freelance contractors can create a project for each client.
With DropTask, you can share your project with family, friends or colleagues who will be working with you. Invite them by inputting their email addresses or via Google contacts.
Once you’ve done this, a blank Canvas will open up, all ready and waiting for you to start setting up your project.
Step 2: Define Project Categories

Categories are an important part of your project, representing topics, goals, stages or job operations. They help to divide your project into more manageable sections. For example, useful categories for your Market Research project may include ‘Online Surveys’, ‘Focus Groups’, ‘Interviews’, ‘Field Experiments’, etc.
Add a category in DropTask by simply dragging the Category bubble from the top navigation bar and ‘dropping’ it onto your Canvas. Assign a color to your category to act as a ‘code’ for increased organization.
Step 3: Plan your Tasks

Within each Category, map out your key tasks based on the deliverables you need to produce in order to meet the project’s goals. What are the specific action steps you’re expected to complete? If you run a business club, your ‘Quarterly Event’ category might include tasks such as include ‘Organize Catering’, ‘Send Out Invitations’, ‘Prepare Presentation’, etc. To add a Task, click on the Task bubble from the top navigation bar and drag it to the appropriate category. At any time, you can move or re-position your task on your Canvas or place it into different categories via drag and drop.

Use the ‘Add Notes’ option in the Task Sidebar to include any comments or details you think are important to complete the task (e.g. client contact information, an outline of instructions), and upload task-related Files (documents, spreadsheets, photos) using the Paperclip icon to collate all your content neatly.

For each task, determine who will be responsible for its completion. To Assign a task to someone – i.e. yourself, a team member, or multiple people – select your chosen member from the ‘Members’ panel on the left-hand side, and drag and drop them onto your task. Or use the dropdown menu available in the Task Sidebar. To collaborate, use the @ symbol in front of a person’s name when leaving a Comment for their attention. This will notify them directly in their dashboard and via email.

Once your categories are filled with tasks, identify any Dependencies. Do certain tasks need to be completed before you can make a start on others? Use DropTask to define the order in which a series of tasks must be actioned. Drag and drop the ‘first’ task onto its dependent. An arrow will then appear representing the link between the two tasks. Being able to visualize task connections in this way is invaluable for keeping track of your project workflow.
Step 4: Set Start and Due Dates

Next, estimate Start and Due Dates for each action step or deliverable in your project plan. Simply select a task to open up the Task Sidebar, then select ‘Start’ or ‘Due’ situated next to the Calendar icon. A date picker will pop up for you to choose your start or due date. Once dates are set, your tasks will be automatically recorded in your Calendar, helping you manage your time effectively to meet your deadlines. As well as one-off dates, you can set timescales on a recurring basis for Repeating Tasks. When selecting a due date for your task, you can opt to repeat it every day, week, month or year. Your repeating schedule will be visible under the ‘Due’ date in the Task Sidebar and the task will be repeated in your Calendar according to the frequency you have selected.
To add even more power to your time management, you can set Task Reminders from under the ‘Alarm’ icon in the Task Sidebar. You also have the option to include an additional note to prompt you on what you need to do when alerted. Staying on track has never been so easy!
Step 5: Prioritize Tasks

Once you have all your tasks in front of you, prioritize them by setting Importance and Urgency attributes. In the hurly-burly of the workday, it’s easy to let your biggest tasks get crowded out by emails, meetings and other small, pressing errands. Identifying your most important tasks beforehand allows you to focus your attention on where you’ll have the greatest impact. In DropTask, you can assign various levels of Importance to your tasks, which are visually highlighted on your Canvas workspace by different colored flags. First, select a task to open up the Task Sidebar. Next to the ‘Flag’ icon, you have the option to choose from one of four priority settings – Blue (low importance), Gray (normal importance), Amber (high importance) or Red (very high importance).
To rank your tasks according to Urgency, find the ‘Urgency’ icon in the Task Sidebar and select a corresponding color – Blue (low urgency), Gray (medium urgency), Amber (high urgency) or Red (very high urgency). A colored lightning bolt will appear in the task circle, drawing your attention to the most time-sensitive tasks on your Canvas. Your most urgent tasks will also appear at the top of your task list in List View.
Step 6: Mark your Progress

As you work your way through your project tasks, keep track of how things are progressing with DropTask’s Progress Percentage Bar. Click on a task to open up the Task Sidebar. Near the top, you’ll find the progress bar. Simply move the progress slider along the bar to record the percentage of the task that’s been completed. This allows you to visually monitor your activity and offers a quick boost to your motivation, keeping you forging ahead. Once a task is complete, just tap the ‘Tick’ button at the end of the bar to automatically slide it to 100%.
DropTask stores all your completed tasks in the Completed Tasks view, where you can see all the tasks that have been removed from your active Canvas and Calendar after completion. There are two options for viewing your completed tasks: Project Completed Tasks (via the ‘Completed’ button on the top-right hand side of the screen within your project), and All Completed Tasks (by selecting ‘Completed’ from under the Menu.
Step 7: Finish up

So, you made it! Your project’s all done and you can revel in your success. But wait! Instead of deleting your project and forgetting all about it, Archive it in DropTask. This clears up space so you can focus on your newest projects, while still keeping a full history of what you’ve done before that you can refer back to whenever needed. To archive a project that no longer requires auctioning, select the ‘Cog’ icon situated on the right-hand side of the top navigation bar. A pop-up window will open up, which includes an ‘Archived’ option. Click ‘Yes’ next to this to safely store your project. You’ll be able to view it again under the ‘Archived Projects’ section in the main Menu.
What are you waiting for? With these quick start tips, you have the basic structure you need to launch your next project. Already using DropTask for project management? Then let us know how you go about it in the comments below.
New to Ayoa? For more info on how each feature works, head over to the Ayoa Help Hub or contact us directly at support@ayoa.com.